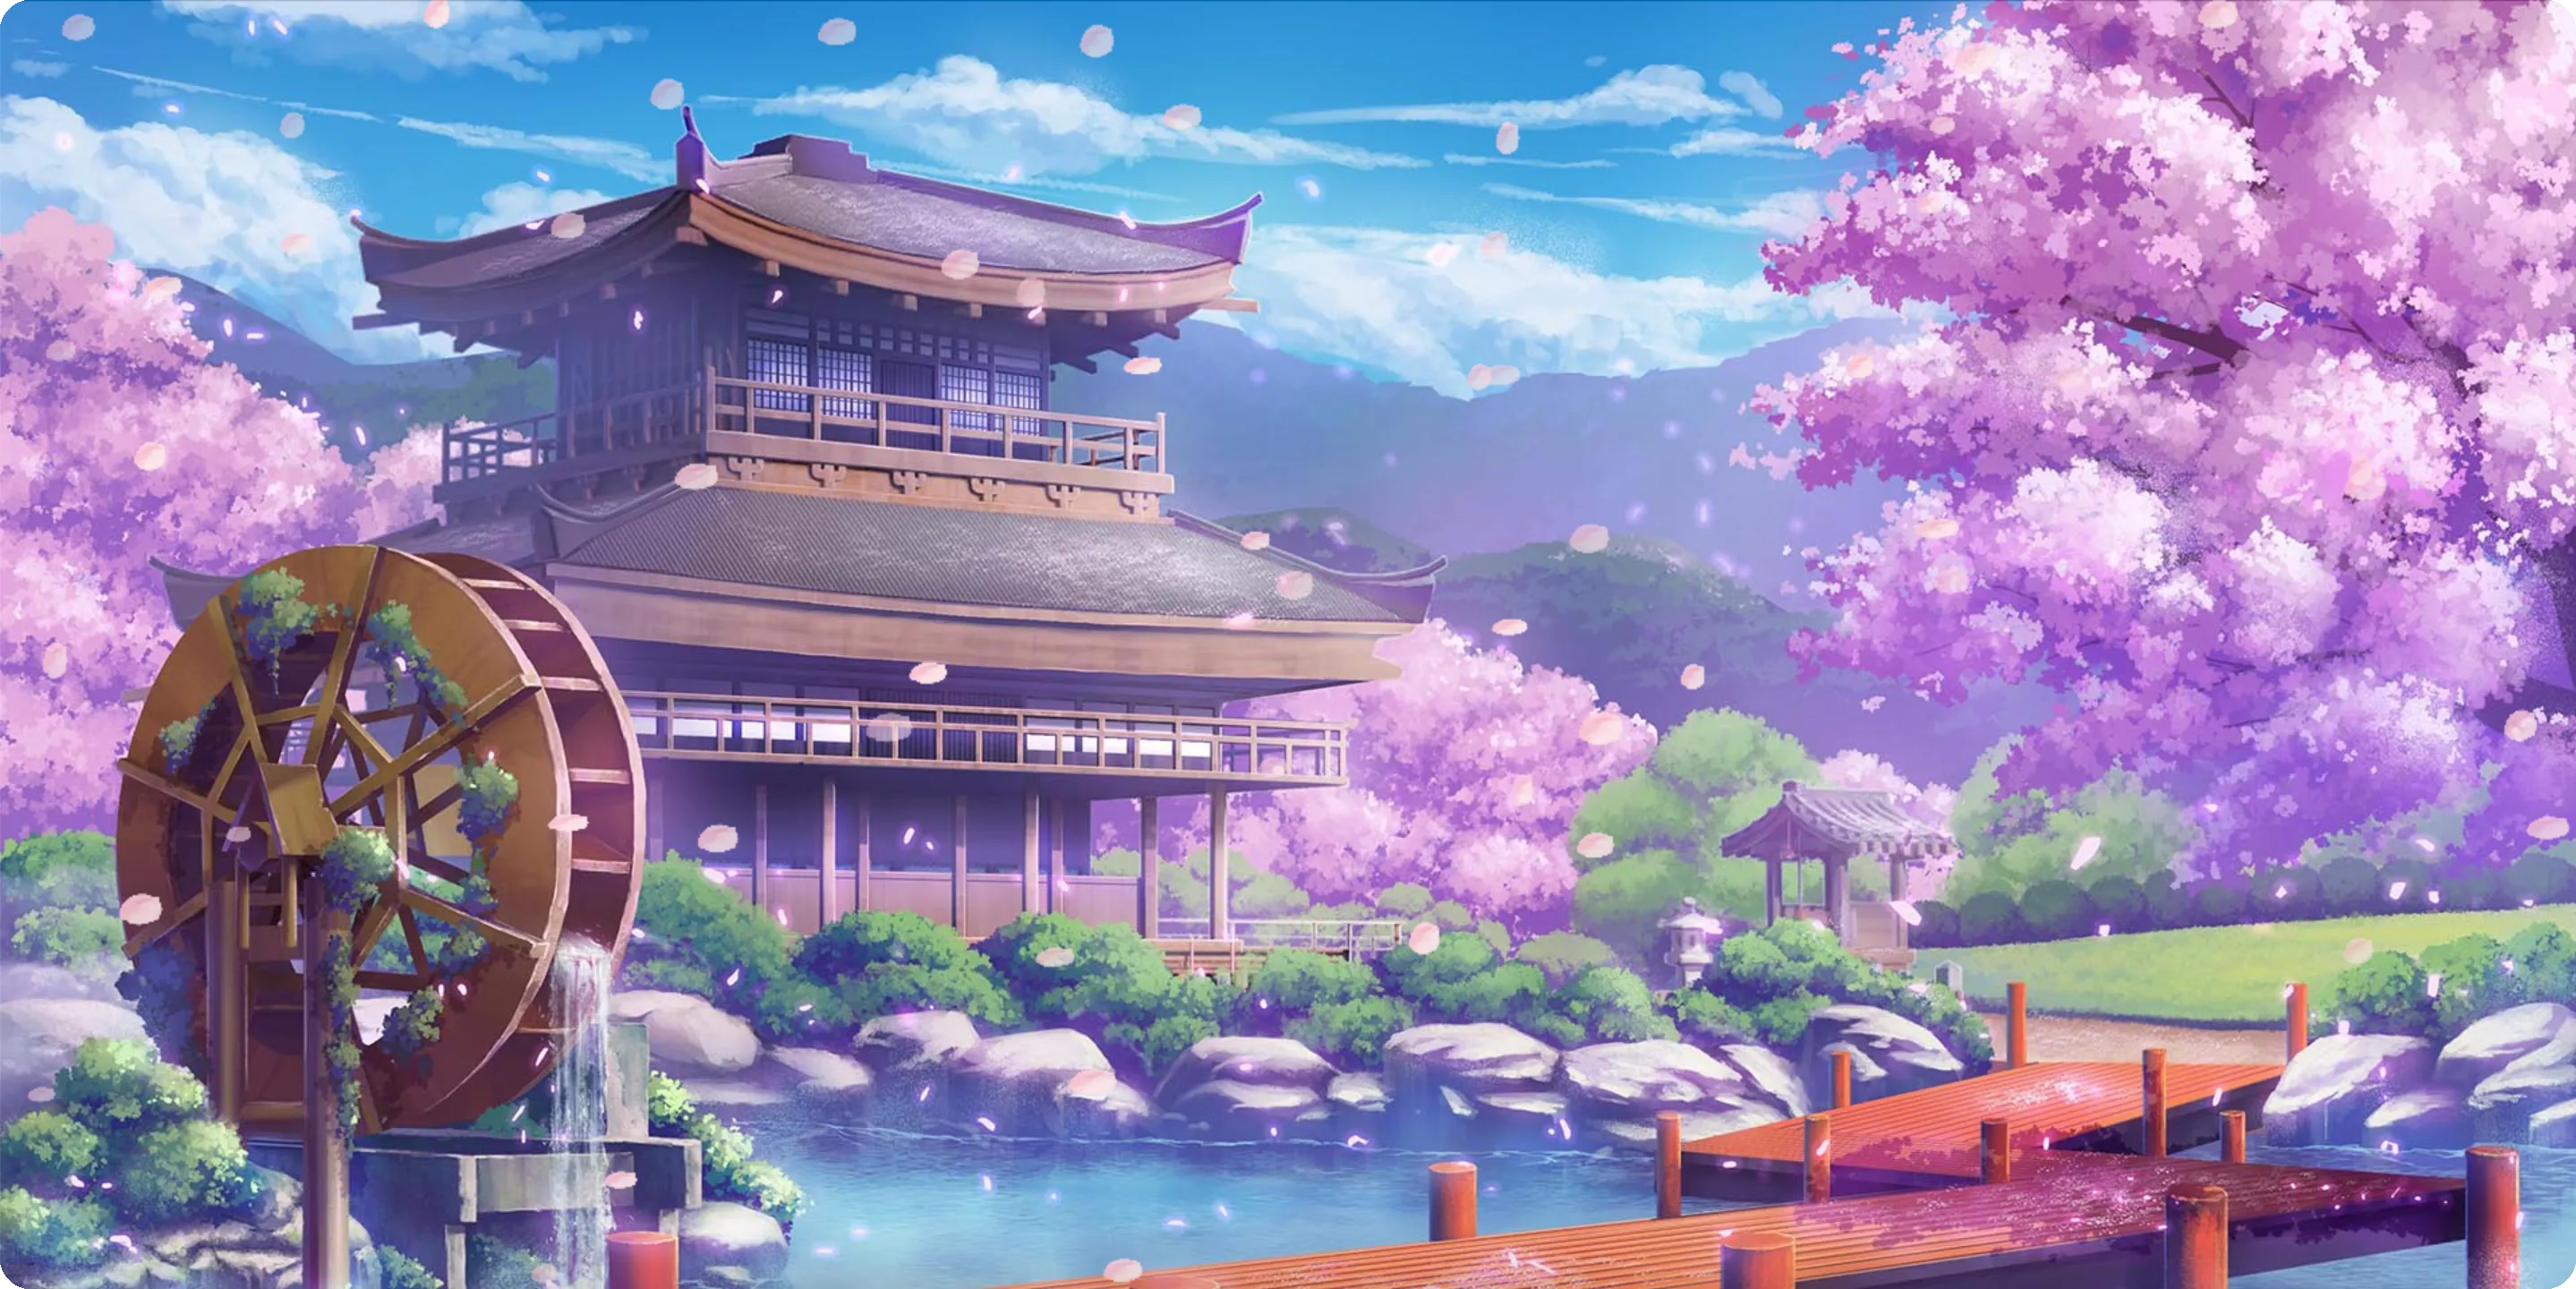
之前参观别人的博客发现了一个很赞的樱花飞舞效果,于是便想着自己也来实现一下。
效果预览
思路
首先要实现这种复杂的动画效果,肯定是要用到 canvas 了
要研究一个复杂的动画效果,其实可以从动画静止的时候进行切入研究
比如要实现一个樱花飞舞背景效果,先假设背景是静止的,那么在这一刻背景就是由一些位置不同、旋转角度不同的樱花的图片组成的
那么我们要实现的第一步就是生成很多图片,然后随机生成他们的位置和旋转角度、透明度等属性,并画到 canvas 上
这样我们就实现了静态效果,接下来是不是只要不停的更改这些图片的位置、旋转角度等属性,每次更改后再画到 canvas 上,就实现我们需要的动画效果
实现流程
明确思路后我们不难得出以下流程
- 准备好 canvas 画布
- 准备好樱花图片
- 随机生成樱花图片的位置、旋转角度、透明度等属性
- 画出樱花图片到 canvas 上
- 不停的更改樱花图片的位置、旋转角度、透明度等属性
- 画出新的樱花图片到 canvas 上
- 重复步骤 5、6
代码实现
先准备好一个基本的 html 界面,界面引入一个 js 文件
你也可以直接在代码写在 script 标签里面
1
2
3
4
5
6
7
8
9
10
11
12
13
14
15
16
17
18
19
20
21
22
23
24
| <!DOCTYPE html>
<html lang="en">
<head>
<meta charset="UTF-8" />
<meta http-equiv="X-UA-Compatible" content="IE=edge" />
<meta name="viewport" content="width=device-width, initial-scale=1.0" />
<title>樱花飞舞</title>
<style>
body {
margin: 0;
padding: 0;
box-sizing: border-box;
background-image: url(https://img.hoshinagi.top/blog/post/front/js/sakura/bg.avif);
background-size: cover;
overflow: hidden;
}
</style>
</head>
<body>
<canvas id="canvas"></canvas>
</body>
<script src="./script.js"></script>
</html>
|
编写 js 文件,实现流程的第三步和第四步
1
2
3
4
5
6
7
8
9
10
11
12
13
14
15
16
17
18
19
20
21
22
23
24
25
26
27
28
29
30
31
32
33
34
35
36
37
38
39
40
41
42
43
44
45
46
47
48
49
50
51
52
53
54
55
56
57
58
59
60
61
62
63
64
65
66
67
68
69
70
71
72
73
74
75
76
77
78
79
80
81
82
83
|
const canvas = document.getElementById("canvas");
canvas.width = window.innerWidth;
canvas.height = window.innerHeight;
const ctx = canvas.getContext("2d");
const SAKURA_SUM = 100;
const sakuraArray = [];
class Sakura {
constructor() {
this.x = Math.random() * canvas.width;
this.y = Math.random() * canvas.height * 2 - canvas.height;
this.width = Math.random() * 15 + 15;
this.height = Math.random() * 12 + 10;
this.opacity = Math.random() * 0.5 + 0.5;
this.rotate = Math.random();
this.xSpeed = Math.random() * 2 + 1;
this.ySpeed = Math.random() + 1.5;
this.rotateSpeed = Math.random() * 0.02;
}
draw() {
if (this.x > canvas.width || this.y > canvas.height) {
this.x = -sakuraImg.width;
this.y = Math.random() * canvas.height * 2 - canvas.height;
this.rotate = Math.random();
this.rotateSpeed = Math.random() * 0.02;
this.xSpeed = Math.random() * 2 + 0.5;
this.ySpeed = Math.random() + 1;
}
ctx.globalAlpha = this.opacity;
ctx.drawImage(
sakuraImg,
this.x,
this.y,
this.width * (0.6 + Math.abs(Math.cos(this.rotate)) / 3),
this.height * (0.8 + Math.abs(Math.sin(this.rotate)) / 5)
);
}
}
function render() {
ctx.clearRect(0, 0, canvas.width, canvas.height);
sakuraArray.forEach((sakura) => sakura.draw());
window.requestAnimationFrame(render);
}
const sakuraImg = new Image();
sakuraImg.src =
"https://img.hoshinagi.top/blog/post/front/js/sakura/sakura.png";
sakuraImg.addEventListener("load", () => {
for (let i = 0; i < SAKURA_SUM; i++) {
sakuraArray.push(new Sakura());
}
render();
});
|
打开 html 界面,我们已经能看到界面上有很多樱花图片了
接下来编写樱花类的动画函数,来让樱花动起来
更新樱花类代码如下,添加一个 animate 函数
每次调用 animate 函数,花瓣的位置、速度、旋转角度等属性都会更新,并且再调用 draw 函数来将樱花画到 canvas 上从而实现动画效果
1
2
3
4
5
6
7
8
9
10
11
12
13
14
15
16
17
18
19
20
21
22
23
24
25
26
27
28
29
30
31
32
33
34
35
36
37
38
39
40
41
42
43
44
45
46
47
48
49
50
51
52
53
|
class Sakura {
constructor() {
this.x = Math.random() * canvas.width;
this.y = Math.random() * canvas.height * 2 - canvas.height;
this.width = Math.random() * 15 + 15;
this.height = Math.random() * 12 + 10;
this.opacity = Math.random() * 0.5 + 0.5;
this.rotate = Math.random();
this.xSpeed = Math.random() * 2 + 1;
this.ySpeed = Math.random() + 1.5;
this.rotateSpeed = Math.random() * 0.02;
}
draw() {
if (this.x > canvas.width || this.y > canvas.height) {
this.x = -sakuraImg.width;
this.y = Math.random() * canvas.height * 2 - canvas.height;
this.rotate = Math.random();
this.rotateSpeed = Math.random() * 0.02;
this.xSpeed = Math.random() * 2 + 0.5;
this.ySpeed = Math.random() + 1;
}
ctx.globalAlpha = this.opacity;
ctx.drawImage(
sakuraImg,
this.x,
this.y,
this.width * (0.6 + Math.abs(Math.cos(this.rotate)) / 3),
this.height * (0.8 + Math.abs(Math.sin(this.rotate)) / 5)
);
}
animate() {
this.x += this.xSpeed;
this.y += this.ySpeed;
this.rotate += this.rotateSpeed;
this.draw();
}
}
|
最后我们还需要修改渲染函数,每次调用 render 函数,遍历花瓣数组,调用 animate 方法进行动画绘制而不是调用 draw 方法进行绘制
更新渲染函数如下
1
2
3
4
5
6
7
8
9
10
11
|
function render() {
ctx.clearRect(0, 0, canvas.width, canvas.height);
sakuraArray.forEach((sakura) => sakura.animate());
window.requestAnimationFrame(render);
}
|
这样我们的效果就已经实现了
总代码
这里选择将所有代码合并到一个 html 文件中
1
2
3
4
5
6
7
8
9
10
11
12
13
14
15
16
17
18
19
20
21
22
23
24
25
26
27
28
29
30
31
32
33
34
35
36
37
38
39
40
41
42
43
44
45
46
47
48
49
50
51
52
53
54
55
56
57
58
59
60
61
62
63
64
65
66
67
68
69
70
71
72
73
74
75
76
77
78
79
80
81
82
83
84
85
86
87
88
89
90
91
92
93
94
95
96
97
98
99
100
101
102
103
104
105
106
107
108
109
110
111
112
113
114
115
116
117
118
119
120
121
122
| <!DOCTYPE html>
<html lang="en">
<head>
<meta charset="UTF-8" />
<meta http-equiv="X-UA-Compatible" content="IE=edge" />
<meta name="viewport" content="width=device-width, initial-scale=1.0" />
<title>樱花飞舞</title>
<style>
body {
margin: 0;
padding: 0;
box-sizing: border-box;
background-image: url(https://img.hoshinagi.top/blog/post/front/js/sakura/bg.avif);
background-size: cover;
overflow: hidden;
}
</style>
</head>
<body>
<canvas id="canvas"></canvas>
</body>
<script>
const canvas = document.getElementById("canvas");
canvas.width = window.innerWidth;
canvas.height = window.innerHeight;
const ctx = canvas.getContext("2d");
const SAKURA_SUM = 100;
const sakuraArray = [];
class Sakura {
constructor() {
this.x = Math.random() * canvas.width;
this.y = Math.random() * canvas.height * 2 - canvas.height;
this.width = Math.random() * 15 + 15;
this.height = Math.random() * 12 + 10;
this.opacity = Math.random() * 0.5 + 0.5;
this.rotate = Math.random();
this.xSpeed = Math.random() * 2 + 1;
this.ySpeed = Math.random() + 1.5;
this.rotateSpeed = Math.random() * 0.02;
}
draw() {
if (this.x > canvas.width || this.y > canvas.height) {
this.x = -sakuraImg.width;
this.y = Math.random() * canvas.height * 2 - canvas.height;
this.rotate = Math.random();
this.rotateSpeed = Math.random() * 0.02;
this.xSpeed = Math.random() * 2 + 0.5;
this.ySpeed = Math.random() + 1;
}
ctx.globalAlpha = this.opacity;
ctx.drawImage(
sakuraImg,
this.x,
this.y,
this.width * (0.6 + Math.abs(Math.cos(this.rotate)) / 3),
this.height * (0.8 + Math.abs(Math.sin(this.rotate)) / 5)
);
}
animate() {
this.x += this.xSpeed;
this.y += this.ySpeed;
this.rotate += this.rotateSpeed;
this.draw();
}
}
function render() {
ctx.clearRect(0, 0, canvas.width, canvas.height);
sakuraArray.forEach((sakura) => sakura.animate());
window.requestAnimationFrame(render);
}
const sakuraImg = new Image();
sakuraImg.src =
"https://img.hoshinagi.top/blog/post/front/js/sakura/sakura.png";
sakuraImg.addEventListener("load", () => {
for (let i = 0; i < SAKURA_SUM; i++) {
sakuraArray.push(new Sakura());
}
render();
});
window.addEventListener("resize", () => {
canvas.width = window.innerWidth;
canvas.height = window.innerHeight;
});
</script>
</html>
|
进阶
其实动画的实现无非就是从一个值变换到另一个值的过程,以后我们如果要实现别的动画,都可以基于这个思路去着手,先从静态切入,然后思考运动轨迹,得出值该如何变换
然后这里需要注意一下,如果你想背景不遮挡你的其他元素,直接控制 canvas 的 z-index 属性即可,把它尽量调的低一些,然后还需要取消 canvas 的鼠标事件,设置 canvas 的 pointer-events 属性为 none,这样实现的背景就只是单纯的一个背景了
想要实现更多特殊的效果,可以自己想一些运动算法更改图片的运动轨迹
如果你想要实现 3D 效果的话,最好使用 three.js 这样的 3D 库进行实现